We have created print ready photo templates to make providing photo evidence easier. It even includes a New EYLF and MTOP Framework Sticker Page so you can show evidence of your transition to the new Approved Frameworks.
About the Weekly Programming and Reflection Child Educator Photo Evidence Template
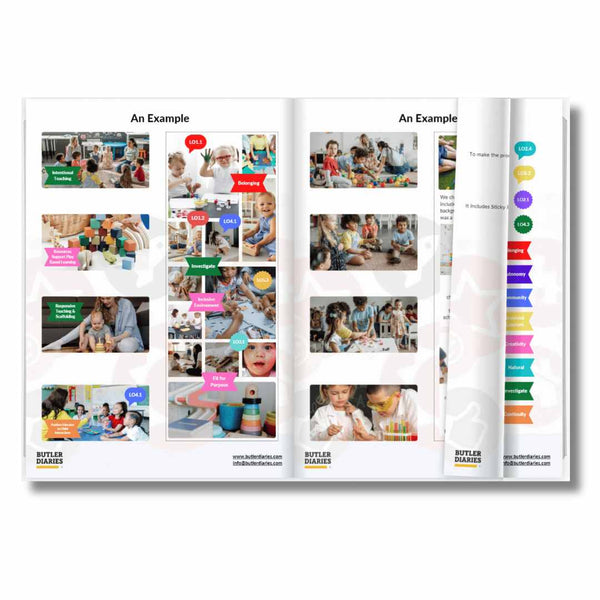
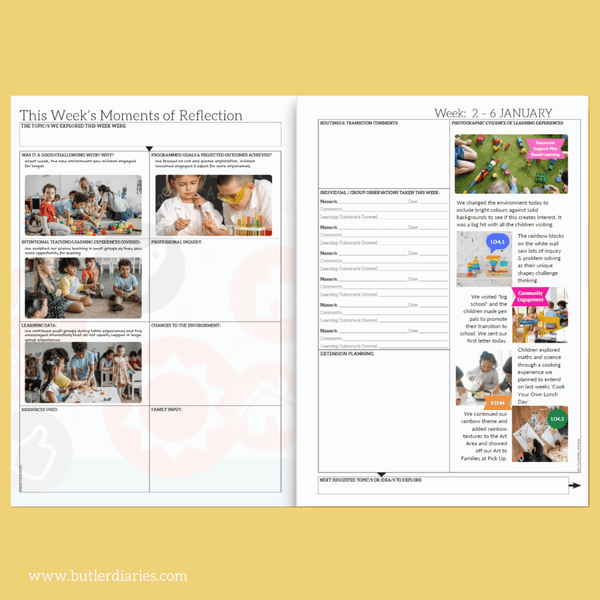
The photo templates on the left are the perfect size for your reflection boxes on the left page of your Reflection Spread in the Weekly Programming and Reflection Child Educator Diary. Handy if you want to show your reflections in image form.

The photo box on the right is the perfect fit for your Photographic Evidence section in your Weekly Programming and Reflection Child Educator Diary. We have a few to choose from so you're not stuck with the same design each week. Some designs give you space to comment next to the photos and add your stickers and others fill the space. This template is designed so you can personalise it to fit your program!
The Print Ready Photo Evidence for your Weekly Programming and Reflection Child Educator Diary Template is a drag and drop design and is user-friendly at all experience levels. Designed to be used with free Canva!
What Templates do we have on Offer?
Programming Printer Pack
We have put together a Programming and Reflection Printer Pack that includes Sticker Paper and a perfectly sized Template.
No more glue sticking your pages... or hands... together. Save time on your Programming and Reflection while also improving your compliance and record-keeping.
All you have to do is follow the simple steps in the template and add your photos for the week, print them out on your Sticker Paper, cut around the template guideline and peel it off and stick it perfectly into your Evidence sections.
You can even print the included Stickers for Personalisation on your sticker paper and use them throughout your Programming and Reflection pages to enhance your evidence and record-keeping.
It includes a template to print your photo evidence for your A4 Diary and a template to print your photo evidence for your A3 Diary onto the A4 sticker paper.
Prefer to Stick and Glue Yourself?
The templates are designed for the:
- Weekly Programming and Reflection Child Educator Diary
- OSHC Weekly Programming and Reflection Diary, and
- QLD Kindy Weekly Programming and Reflection Diary
Bonus templates now included for your Sustainability and Cultural Calendars!
How to use the Weekly Programming and Reflection Child Educator Photo Evidence Templates
There is a step by step video on how to use the templates on the Printer Pack product page.
Once you've followed the steps below and set up your Canva account, you can use your Print Ready Photo Evidence for your Weekly Programming and Reflection Child Educator Diary Template by going to www.canva.com and logging into your account or on the App. You can download the App to your Phone or iPad so you can easily add photos and edit your Design on the go.
Download the Desktop, Android, or Apple Version here.
We recommend adding the App if you use a work Mobile or iPad for your photos. This will allow you to quickly upload your days or week's photos to your Design, ready to add to your Weekly Programming and Reflection Child Educator Diary.
Canva Basics
1) Simply follow the link to open the Template: A4 Template Link, A3 Template Link or get your Programming and Reflection Printing Pack here. Select Use Template and you will be prompted to Sign In or Sign Up using Google, Facebook, or Email. How you choose to create your account is up to you. You do not need to pay for Canva Pro, you can use this Template in the Free version of Canva. The template will automatically be copied into your Canva account.
2) You can zoom into your Design using the toggle on the bottom right and increasing the percentage.

3) On the left hand side is your controls for navigating through your design.
4) You can add any of the above to your template by selecting it and dragging it to the position you want on your page or you can scroll to the page you want to edit and simply click on what you would like to add.


5) You can resize what you have added by using the white dots and bars around it. You can also edit with the options displayed on the white top bar that appears when your addition is selected. If what you are selecting has a small gold Crown on the right-hand corner, this is for Canva Pro only and if added from a free account will have the Canva branding.
6) Remove items by selecting them and pressing delete on your keyboard or dragging them out of the Design.
7) You can undo and redo actions using the arrows on the top left blue header. You can also use this to navigate back to your Home. Here you will find a range of templates you can use and your Child Educator Diary Template in 'Recent Designs.' You can also find all your Designs by selecting 'Projects' on the left.
8) We recommend making a copy of your Template so you can have a clean template to return to if you do something you can't undo.
Do this from the Home or Projects Page. Hover over your unopened design and select the three dots that appear in the top right of the design and select "Make a Copy." Click this design to open it and start designing.
Personalising your Template
1) Scroll down to the page design you would like to use. On the left-hand side of the template are photo frames that fit in the reflection boxes on your Weekly Programming and Reflection Diary.

On the right-hand side is a photo template that fits exactly into your Photographic Evidence section.
2) Select Uploads from your Menu on the left-hand side and select 'Upload Files."
3) Once your files have uploaded, simply drag your photo into the photo templates in your Design.
4) You can readjust the photo's position within the frame by double clicking the image and repositioning it.
5) Repeat this to fill up all the photo frames in your Child Educator Print Ready Template.
6) Use the 'Stickers' on the 'Stickers for Personalisation' page to add more evidence to your Design. To copy the sticker, select it and hit 'Ctrl' and 'C' on your keyboard. To paste your Sticker, head to the page you want to add it to and press 'Ctrl' and 'V'.

Tip! Use the NEW Framework Stickers to support you in providing evidence of your transition to the new EYLF and MTOP Framework.

When you add stickers make sure they are within the Borders of your Design so it still fits perfectly in your Weekly Programming and Reflection Child Educator Diary's Reflections and Evidence sections.
7) Download your Photo Evidence Design by selecting 'Share' in the top right corner.
8) Select 'Download' and in the 'File Type' change it from PNG to 'PDF to Print'. In 'Select Pages' select the Page you have completed your Design. The page numbers can be found at the top left of the Design page.
9) Once downloaded, simply print your document the way you usually would on A4 paper, A3 paper or your Programming and Reflection Printer Pack Sticker Paper depending on which Weekly Programming and Reflection Child Educator Diary you use.
10) Cut around your Photo Evidence and in they go!
Reusing the Template
When you're ready to use the template again, you can simply drag and drop new photos to replace the old ones or select the photo you no longer need and press delete on your keyboard. Then follow the above steps again!
Examples of the Print Ready Photo Evidence for your Weekly Programming and Reflection Child Educator Diary
Below are some examples of the Print Ready Photo Evidence for your Weekly Programming and Reflection Child Educator Diary Template. Stickers shown below are included for easy evidence linking! You can even use Text as described above to add descriptions and reflections before printing.


Tips and Tricks
To make the process of using these templates even simpler, grab the Programming and Reflection Printer Pack so you can print them on Sticker Paper, cut it out as normal, peel off the back and stick it in!
No more glue sticking your pages... or hands... together.
You can grab your Programming and Reflection Printer Pack from Butler Diaries.
 It includes Sticker Paper to print your Photos on which you can also use to print your sticker for personalisation pages too!
You will receive a link to the template!
Need help using this template? Get in touch to info@butlerdiaries.com.
